In this blog post, I will discussed on the topic of stripe payment integration with Golang. Before that i will give brief introduction about this and move head to simple implementation.
It is a famous payment gateway that helps in financial transaction between merchants and customers. It accepts 133+ countries currency. It is a powerful payment engine that makes money move easily. Millions of popular companies like Google, Shipfiy, Uber, Slace use Stripe payment gateway.
Steps to Integration
Step 1: Create stripe account on stripe dashboard
Step 2: Move to the this https://dashboard.stripe.com/test/apikeys url and reveal your secret key.
Step 3: Then install the libraries for access to the Stripe API from your application:
go get github.com/stripe/stripe-go/v74Step 4: Redirect your customer to Stripe Checkout
<html>
  <head>
    <title>Payment for product</title>
  </head>
  <body>
    <form action="/create-checkout-session" method="POST">
      <button type="submit">Checkout</button>
    </form>
  </body>
</html>
Step 5: After creating a checkout session, redirect your customer to the URL returned in the response.
func main() {
	// This is a public sample test API key.
        //Assign your revealed secret key
	stripe.Key = "sk_test_51MOelXSDtyGjsOF1ypWrnjoRQSAteBMw4bIKEIoLbng6yH53RE8EuRPx9CJXSTZXkMAXQetYWovhWblY1xEWYViZ000bUuHaux"

	http.Handle("/", http.FileServer(http.Dir("public")))
	http.HandleFunc("/create-checkout-session", createCheckoutSession)
	addr := "localhost:4242"
	log.Fatal(http.ListenAndServe(addr, nil))
}

func createCheckoutSession(w http.ResponseWriter, r *http.Request) {
		params := &stripe.CheckoutSessionParams{
		Mode: stripe.String(string(stripe.CheckoutSessionModePayment)),
		LineItems: []*stripe.CheckoutSessionLineItemParams{
			{
				PriceData: &stripe.CheckoutSessionLineItemPriceDataParams{
					Currency: stripe.String("usd"),
					ProductData: &stripe.CheckoutSessionLineItemPriceDataProductDataParams{
						Name: stripe.String("Service"),
					},
					UnitAmount: stripe.Int64(3000),
				},
				Quantity: stripe.Int64(1),
			},
		},
		SuccessURL: stripe.String("http://localhost:3000/success"),
		CancelURL:  stripe.String("http://localhost:3000/cancel"),
	}

	s, err := session.New(params)
	if err != nil {
		log.Printf("session.New: %v", err)
	}
	http.Redirect(w, r, s.URL, http.StatusSeeOther)
}
Step 6: Show a success or failure page after checkout.
<html>
  <head><title>Thanks for your order!</title></head>
  <body>
    <h1>Thanks for your order!</h1>
    <p>
      We appreciate your business!
      If you have any questions, please email
      <a href="mailto:orders@example.com">orders@example.com</a>.
    </p>
  </body>
</html>
Step 7: There are several test cards you can use to make sure your integration is ready for production. Use them with any CVC, postal code and future expiration date.
- Succeeds and immediately processes the payment.
- 4242 4242 4242 4242
- Complete 3D Secure 2 authentication for a successful payment.
- 4000 0000 0000 3220
- Always fails with a decline code of
insufficient_funds.- 4000 0000 0000 9995
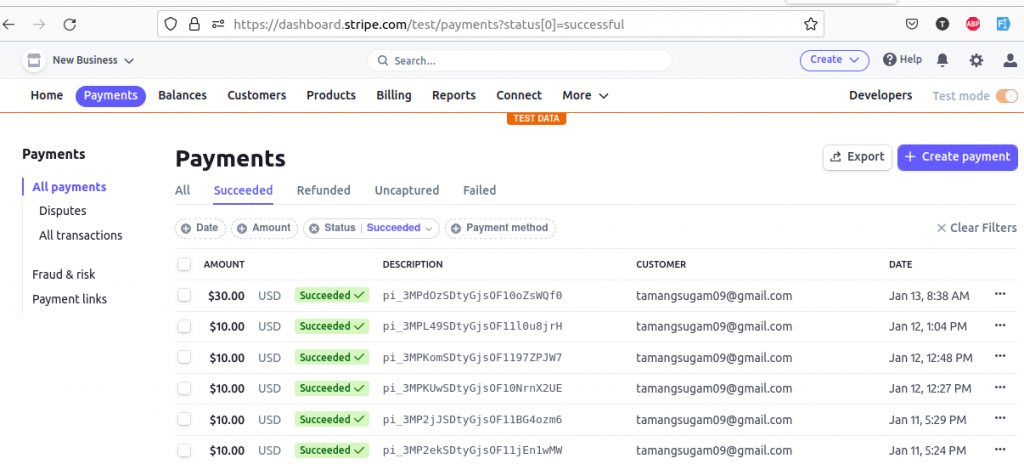
Step 8: Finally we can see the marchent dashboard to see the checkout.


